
Intro
Transform any surface into a functional dry erase board with paint. Discover 5 creative ways to make a DIY dry erase board using specialized paint, including glass, wood, and metal surfaces. Learn how to create a smooth, durable, and erasable finish using dry erase paint, perfect for home, office, or educational settings.
In today's fast-paced world, staying organized and creative is more important than ever. One simple yet effective way to achieve this is by creating a dry erase board with paint. This versatile tool can be used in various settings, from homes and offices to schools and communities. Not only is it an excellent way to jot down reminders, to-do lists, and brainstorming ideas, but it also encourages creativity and self-expression. In this article, we'll explore five innovative methods to create a dry erase board using paint, providing you with a comprehensive guide to get started.
The Benefits of a Dry Erase Board
Before we dive into the different methods, let's take a look at the benefits of having a dry erase board in your space. A dry erase board is an excellent tool for:
- Staying organized and focused
- Encouraging creativity and self-expression
- Brainstorming ideas and collaborating with others
- Creating a visually appealing and interactive space
- Reducing clutter and increasing productivity
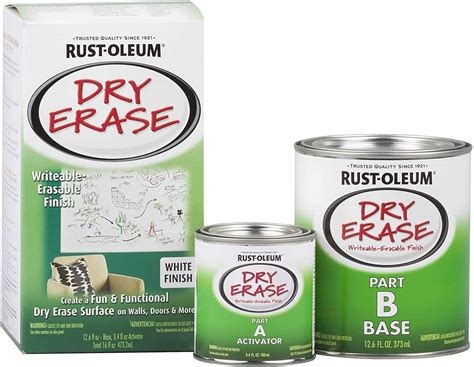
Method 1: Using Dry Erase Paint
Using dry erase paint is one of the most popular methods to create a dry erase board. This specialized paint is designed to provide a smooth, glossy surface that is perfect for writing with dry erase markers.
To create a dry erase board using dry erase paint, simply follow these steps:
- Choose a surface: Select a smooth surface, such as a wall, door, or piece of furniture.
- Clean the surface: Make sure the surface is clean and dry.
- Apply the paint: Use a roller or brush to apply the dry erase paint to the surface.
- Allow it to dry: Let the paint dry completely according to the manufacturer's instructions.
- Add a frame (optional): Add a frame around the painted area to create a finished look.
Method 2: Using Chalkboard Paint and a Clear Coat
Another method to create a dry erase board is by using chalkboard paint and a clear coat. This method provides a smooth surface that is perfect for writing with dry erase markers.

To create a dry erase board using chalkboard paint and a clear coat, follow these steps:
- Choose a surface: Select a smooth surface, such as a wall, door, or piece of furniture.
- Clean the surface: Make sure the surface is clean and dry.
- Apply the chalkboard paint: Use a roller or brush to apply the chalkboard paint to the surface.
- Allow it to dry: Let the paint dry completely according to the manufacturer's instructions.
- Apply a clear coat: Use a clear coat to seal the chalkboard paint and create a smooth surface.
Method 3: Using Whiteboard Paint
Whiteboard paint is another popular option to create a dry erase board. This paint provides a smooth, glossy surface that is perfect for writing with dry erase markers.

To create a dry erase board using whiteboard paint, follow these steps:
- Choose a surface: Select a smooth surface, such as a wall, door, or piece of furniture.
- Clean the surface: Make sure the surface is clean and dry.
- Apply the whiteboard paint: Use a roller or brush to apply the whiteboard paint to the surface.
- Allow it to dry: Let the paint dry completely according to the manufacturer's instructions.
Method 4: Using a Dry Erase Coating
A dry erase coating is a specialized product that can be applied to a surface to create a dry erase board. This coating provides a smooth, glossy surface that is perfect for writing with dry erase markers.

To create a dry erase board using a dry erase coating, follow these steps:
- Choose a surface: Select a smooth surface, such as a wall, door, or piece of furniture.
- Clean the surface: Make sure the surface is clean and dry.
- Apply the coating: Use a roller or brush to apply the dry erase coating to the surface.
- Allow it to dry: Let the coating dry completely according to the manufacturer's instructions.
Method 5: Using a DIY Dry Erase Kit
A DIY dry erase kit is a great option for those who want to create a dry erase board without spending a lot of money. These kits usually include a specialized paint and a clear coat that can be applied to a surface.

To create a dry erase board using a DIY dry erase kit, follow these steps:
- Choose a surface: Select a smooth surface, such as a wall, door, or piece of furniture.
- Clean the surface: Make sure the surface is clean and dry.
- Apply the paint: Use a roller or brush to apply the specialized paint to the surface.
- Allow it to dry: Let the paint dry completely according to the manufacturer's instructions.
- Apply the clear coat: Use the clear coat to seal the paint and create a smooth surface.
Tips and Tricks
Here are some tips and tricks to keep in mind when creating a dry erase board with paint:
- Make sure the surface is clean and dry before applying the paint or coating.
- Use a primer if necessary to ensure a smooth finish.
- Apply multiple coats of paint or coating to achieve the desired color and finish.
- Use a clear coat to seal the paint or coating and create a smooth surface.
- Avoid using dry erase markers on a surface that has not been properly prepared.
Conclusion
Creating a dry erase board with paint is a fun and easy DIY project that can be completed in just a few hours. With the five methods outlined above, you can create a dry erase board that is perfect for your home, office, or school. Whether you're looking to stay organized, encourage creativity, or simply add a touch of style to your space, a dry erase board is a great option. So why not give it a try? Grab some paint and get creative!
FAQs
What is the best type of paint to use for a dry erase board?
+The best type of paint to use for a dry erase board is a specialized paint that is designed specifically for dry erase boards. This type of paint provides a smooth, glossy surface that is perfect for writing with dry erase markers.
Can I use regular paint for a dry erase board?
+No, regular paint is not suitable for a dry erase board. Regular paint does not provide a smooth, glossy surface that is necessary for writing with dry erase markers.
How long does it take for the paint to dry?
+The drying time for paint can vary depending on the type of paint and the environmental conditions. It's best to follow the manufacturer's instructions for drying time.