
Intro
Learn the expert techniques for a flawless Hardie Board trim installation. Discover 5 essential methods to master the art of exterior trim installation, including measuring, cutting, and finishing. Improve your skills with our comprehensive guide, covering best practices, tool selection, and troubleshooting tips for a professional-looking finish.
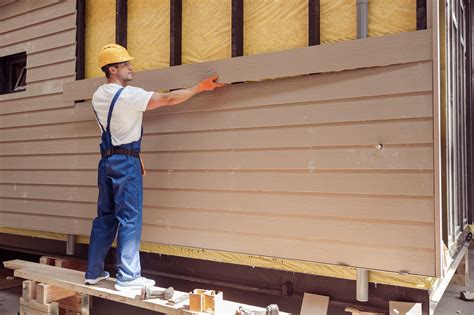
Installing Hardie board trim is a crucial step in completing the exterior of a house. Not only does it enhance the aesthetic appeal of the building, but it also provides a protective barrier against the elements. When done correctly, Hardie board trim installation can last for decades without showing signs of wear. However, mastering this skill requires attention to detail, patience, and practice. Here are five ways to help you master Hardie board trim installation.

Understanding the Basics of Hardie Board Trim
Before diving into the installation process, it's essential to understand the basics of Hardie board trim. Hardie board, also known as fiber cement siding, is a durable and low-maintenance material made from a combination of sand, cement, and wood fibers. It's designed to withstand harsh weather conditions and can be used for both exterior and interior applications. Hardie board trim comes in various styles and sizes, making it versatile for different architectural designs.
Preparation is Key to Successful Installation
Preparation is critical to ensure a smooth and successful Hardie board trim installation. Here are some steps to take before starting the installation process:
- Inspect the area: Ensure the area where you'll be installing the trim is clean, dry, and free from debris.
- Measure and mark the area: Measure the length and width of the area where you'll be installing the trim, and mark it with a pencil.
- Cut the trim: Cut the Hardie board trim to the required length using a circular saw or a miter saw.
- Prepare the necessary tools: Gather all the necessary tools, including a drill, screws, and a level.
Mastering the Installation Process
Now that you've prepared the area and the trim, it's time to start the installation process. Here are some steps to follow:
- Start with the corners: Begin by installing the trim at the corners of the building, working your way down to the bottom.
- Use a level: Ensure the trim is level and plumb before screwing it into place.
- Screw the trim: Use a drill to screw the trim into place, spacing the screws about 16 inches apart.
- Use a caulk gun: Apply caulk to the gaps between the trim and the wall to create a watertight seal.
Tips and Tricks for a Professional Finish
To achieve a professional finish, here are some tips and tricks to keep in mind:
- Use a mitre saw: A mitre saw is essential for making precise angled cuts, which is critical for a professional finish.
- Use a coping saw: A coping saw is useful for cutting curved cuts, which can be challenging to make with a circular saw.
- Use a sanding block: A sanding block helps to smooth out the edges of the trim, creating a seamless finish.

Common Mistakes to Avoid
When installing Hardie board trim, there are several common mistakes to avoid. Here are some of the most common mistakes:
- Incorrect measurement: Measuring the area incorrectly can lead to trim that's too short or too long.
- Insufficient preparation: Failing to prepare the area properly can lead to a poor finish.
- Incorrect screw spacing: Screwing the trim too close together can lead to a weak hold.
Conclusion and Final Thoughts
Mastering Hardie board trim installation requires patience, practice, and attention to detail. By following these five ways, you'll be well on your way to achieving a professional finish that will last for decades. Remember to prepare the area properly, measure and mark the area accurately, and use the right tools for the job. With practice and experience, you'll become a master of Hardie board trim installation.

FAQs
What is Hardie board trim?
+Hardie board trim is a type of fiber cement siding made from a combination of sand, cement, and wood fibers.
How do I cut Hardie board trim?
+You can cut Hardie board trim using a circular saw or a miter saw.
What is the recommended screw spacing for Hardie board trim?
+The recommended screw spacing for Hardie board trim is about 16 inches apart.