
Intro
Get into the spooky spirit with our Jack Skellington Pumpkin Carving Template Guide! Learn how to carve a mesmerizing pumpkin with our step-by-step tutorial, featuring the beloved Nightmare Before Christmas character. Discover expert tips, stencils, and design ideas to create a hauntingly beautiful Jack-o-lantern, perfect for Halloween decorating and pumpkin carving enthusiasts.
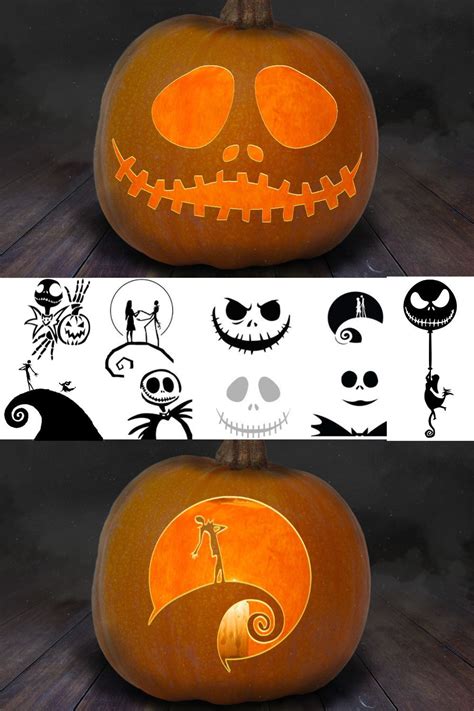
The spooky and kooky world of Halloween is just around the corner, and what better way to get into the spirit than with a Jack Skellington pumpkin carving template? For fans of the beloved stop-motion classic, "The Nightmare Before Christmas," this guide is a must-have for creating a pumpkin masterpiece that's sure to impress.
As the Pumpkin King of Halloween Town, Jack Skellington is a beloved character known for his ghostly grin and skeletal charm. With this template guide, you'll be able to bring Jack to life on your porch or in your home, adding a touch of Halloween magic to your decor. Whether you're a seasoned pumpkin carver or a beginner, this guide will walk you through the process of creating a Jack Skellington pumpkin that's sure to be the envy of all your friends.
Why Use a Jack Skellington Pumpkin Carving Template?
Using a Jack Skellington pumpkin carving template offers several benefits, including:
- Easy to use: Even if you're new to pumpkin carving, a template makes it easy to create a professional-looking design.
- Time-saving: With a template, you don't have to spend hours designing your own pattern or free-handing a complicated design.
- Consistent results: A template ensures that your pumpkin carving turns out the same every time, with clean lines and precise details.
Materials Needed for Jack Skellington Pumpkin Carving
Before you start carving, make sure you have the following materials:
- A pumpkin (any size or shape will do)
- A Jack Skellington pumpkin carving template (available online or created using a stencil)
- A serrated knife or pumpkin-carving tool
- A scoop or spoon for removing pumpkin pulp and seeds
- A marker or pencil for tracing the template design
- A candle or LED light for illuminating your finished pumpkin
Step-by-Step Guide to Carving a Jack Skellington Pumpkin

Now that you have your materials, it's time to start carving! Follow these steps for a spook-tacular Jack Skellington pumpkin:
- Cut a lid: Use a serrated knife to cut a circular lid on top of your pumpkin. Scoop out the pulp and seeds using a spoon or specialized tool.
- Trace the template: Place the Jack Skellington pumpkin carving template on your pumpkin and use a marker or pencil to trace the design.
- Carve the design: Use a serrated knife or pumpkin-carving tool to carefully carve out the design, following the lines you traced in step 2.
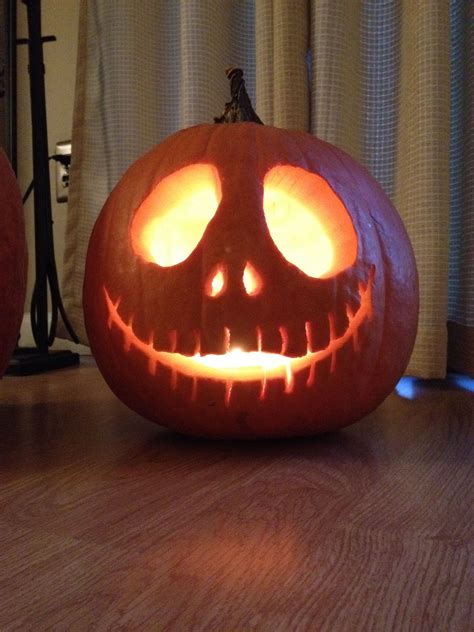
- Add details: Use a smaller knife or tool to add finer details, such as Jack's eyes, nose, and mouth.
- Light it up: Place a candle or LED light inside your pumpkin to illuminate your finished design.
Tips and Variations for Your Jack Skellington Pumpkin
To make your Jack Skellington pumpkin truly unique, try these tips and variations:
- Add a 3D effect: Use a small amount of modeling clay or paper mache to create a 3D effect on your pumpkin, such as adding depth to Jack's eyes or nose.
- Experiment with colors: Use paint or markers to add color to your pumpkin, creating a bold and eye-catching design.
- Combine with other designs: Mix and match different pumpkin carving templates to create a unique design that combines Jack Skellington with other beloved characters.
Common Mistakes to Avoid When Carving a Jack Skellington Pumpkin
When carving a Jack Skellington pumpkin, it's easy to make mistakes that can ruin your design. Here are some common errors to avoid:
- Cutting too deep: Be careful not to cut too deeply into your pumpkin, as this can cause it to collapse or break apart.
- Not using a template: Free-handing a design can be tricky, especially if you're new to pumpkin carving. Use a template to ensure clean lines and precise details.
- Not scooping out enough pulp: Make sure to remove enough pulp and seeds from your pumpkin to allow for even carving and to prevent rot.
Conclusion: Get Creative with Your Jack Skellington Pumpkin
With this guide, you're ready to create a spook-tacular Jack Skellington pumpkin that's sure to impress your friends and family. Don't be afraid to experiment with different designs and variations, and have fun with the process! Whether you're a seasoned pumpkin carver or a beginner, this template guide is the perfect way to get into the Halloween spirit.
What is the best type of pumpkin to use for carving?
+Look for a sugar pumpkin or a carving pumpkin, which are specifically grown for their size, shape, and durability. These pumpkins are ideal for carving and will last longer than other types of pumpkins.
How do I make my pumpkin last longer?
+To make your pumpkin last longer, make sure to scoop out all the pulp and seeds, and dry the interior thoroughly. You can also apply a commercial pumpkin preservative or petroleum jelly to the cut surfaces to help prevent rot.
Can I use a real candle to light my pumpkin?
+Yes, you can use a real candle to light your pumpkin, but make sure to exercise caution. Use a votive candle or a tea light, and place it on a stable surface away from flammable materials. Never leave a lit candle unattended.